Overview
An issue I saw a number of times at customers was that the Windows 7 Aero theme was not enabled after deployment. I saw this numerous times in early workshops and pilots for customers and completely forgot about it until I saw the question asked again a few weeks ago. So here is a post describing the sort of symptoms you might see and how to workaround it.
Aero Troubleshooting
There are two main tools that people turn to when troubleshooting Aero:
- Running the ‘Find and fix problems with transparency and other visual effects‘ troubleshooter that attempts to automatically find and fix issues.
- Re-running the Desktop Window Manager (DWM) WinSAT test (either through the standard interface or by running ‘winsat dwm’ from the command line).
In the case of this particular issue both of these methods will not solve the problem and simply report that ‘DWM not running‘ or ‘Desktop Window Manager is disabled‘ and the system will still not enable Aero. The strange thing is you can get Aero by doing the following:
- Right-click the desktop, select Personalize.
- Re-select the standard Windows 7 theme (or any other Aero theme).
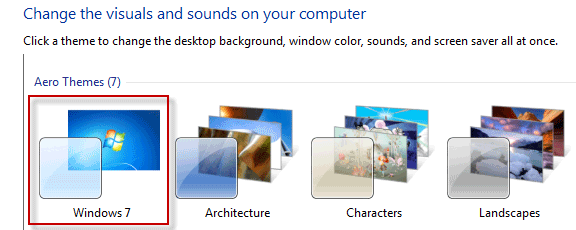
- Aero magically starts working again.
Obviously, manually selecting the Windows 7 theme on each machine isn’t going to work when you are deploying more than a couple of machines, but there are two simple solutions.
Solution 1
The easiest solution for an enterprise customer is probably going to be by using Group Policy:
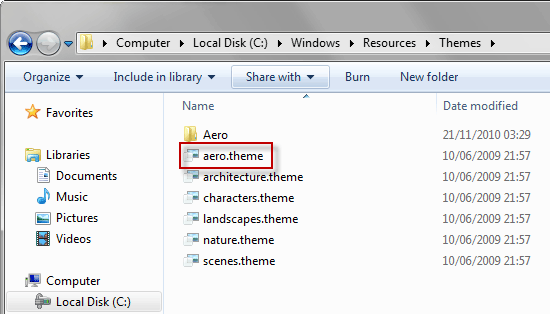
- Find the path of a theme we want to use – aero.theme is the standard Windows 7 theme and can be found in C:\Windows\Resources\Themes\aero.theme
- Open the Group Policy console (gpmc or local group policy as required).
- Find the policy User Configuration \ Administrative Templates \ Personalization \ Load a specific theme
- Enter the path of the theme, we will use an environment variable so that it works on all machines: %windir%\Resources\Themes\aero.theme
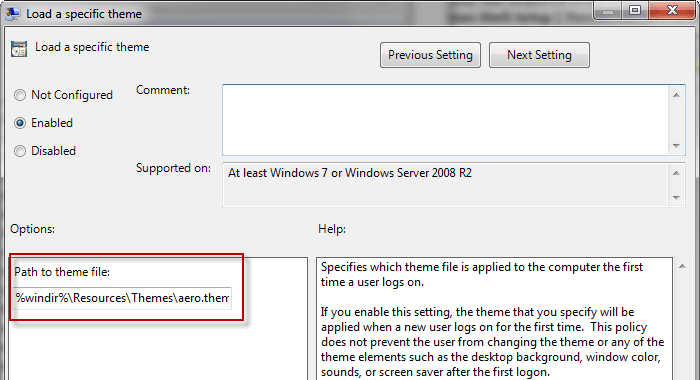
- Save the policy and apply it to the relevant Organizational Units (OUs).
Note: This only changes the theme for a user’s first-time logon which makes it quite a neat solution.
Solution 2
The second solution can be used when deploying Windows 7 using an unattend.xml answer file. To make the required changes:
- Open the unattend.xml answer file in the Windows System Image Manager which is installed with the Windows Automated Installation Kit (WAIK).
- Add the component amd64_Microsoft-Windows-Shell-Setup_neutral to the Specialize pass (use the x86 version if not using Windows 7 64-bit).
- Find the Themes \ ThemeName entry.
- Add the Aero theme name you wish to use – use just the main part of the filename (see the Windows Theme folder screenshot above). For the standard Windows 7 theme the value is ‘aero‘.
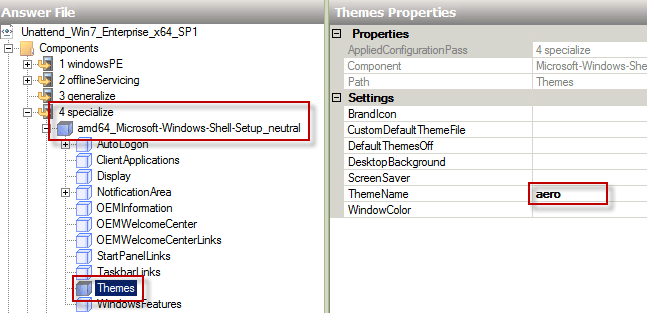
- Save the unattend.xml file and deploy!





I have the same problem at the moment, but very sporadic on the same hardware rebuild after rebuild. The GPO is in effect, but maybe the theme will apply, probably it won’t.
Running %windir%\Resources\Themes\aero.theme from a command line (or as part of Startup) will do it, but Explorer has to refresh and so leaves the Themes window open. AutoIt can and will shut that window, but its not obviously not silent, leading to “what was that window?” from the client.